
To make this Thanksgiving decoration, paint a paper plate yellow, allow to dry then paint the child's hand (see below) and press down in the middle of the plate. Child can decorate edges with various fall colors and add a googly eye and legs. Use a hole puncher to punch two holes at the top and thread yarn through to hang.

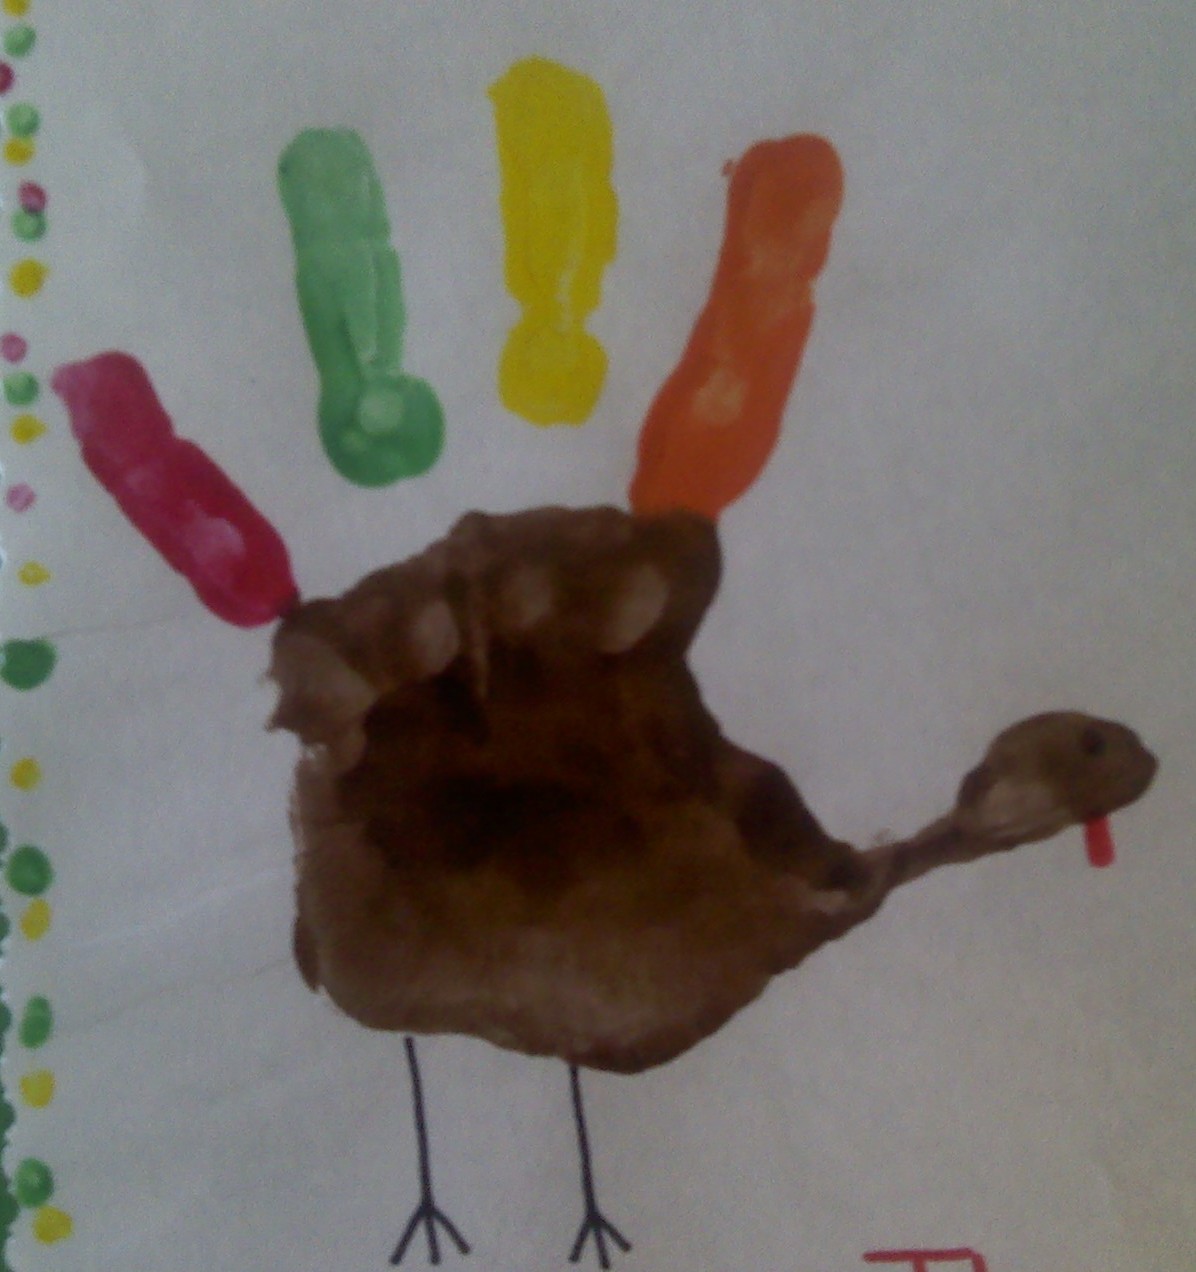
This is one of my favorite activities to do with the children each year. It is a timeless keepsake their Parents will treasure forever! This placemat can be used everyday (its laminated) or just Thanksgiving each year. Paint the child's hand as shown below and press down on the very left side of the paper. On the right side I draw an outline of corn and the children color the stalks green and use Q-tips to make the kernels. In the center (not shown) I put a picture of the child (framed). On the bottom write "I am thankful for (ask child what they are thankful for and write it here). Laminate! They can decorate around the edges to add their own creative flare.


Use small paper plates to create these simple apples. Tear up pieces of construction paper and glue onto the plate or cut up tissue paper and crumple them up to glue onto the plate. Either way they come out cute. Add leaves and stem made from construction paper.

I'm a scary scarecrow made of straw (stretch hands out)
Listening for the crows to caw (cover ears)
I watch the field all day and night too (put hand to forehead like you are searching)
If a crow comes by, I just yell BOO! (yell boo)

Leaf Window Clinger
You will need:
• transparency paper (the kind you use for overhead projectors)
• leaf template (from template tab)
• 1/4 cup white glue
• 7-10 drops of yellow, green, red, or orange food coloring
• paint brush
What to do:
~ cut out leaves from transparency paper using the leaf stencil (one per child)
~ Mix white glue and food coloring in a small bowl
~ brush a thick layer of the glue/food coloring mix onto the leaf leaving no "white" space
~ let dry for 24 hours
~ peel off the "leaf" and cling to any window!

What you need:
• 1 paper plate per child
• red, green or yellow paint (let child choose color)
• apple seeds (let the children taste many kinds of apples, great way to get the seeds and teach a lesson as well)
• glue
• green and brown construction paper
What to do:
~ Paint the paper plate and allow to dry
~ glue seeds in the middle
~ add leaves and stem with green/brown construction paper

Apple Prints
You will need:
•Apples (green, yellow,red)
•Tempra Paint (yellow,red,green)
•Paper plates
•white construction paper (large works best)
What to do:
•cut apples in half
•pour tempra paint on paper plates; green on one, red on another, yellow on the last plate.
•place 1/2 of the apple down into the paint (red apple in the red paint, green in green paint etc)
•children will take the apple and make "apple prints" on the paper provided.
•allow them to make as many apples/colors the choose.
•if apples get messy simply rinse under water and they are good to go for next child!

Tissue Paper Fall Trees
You Will Need:
•Variety of tissue paper in fall colors; yellow,green,red,brown,orange
•Tree template from template tab above (trace or copy onto white construction paper for each child)
•Brown crayons or markers
•glue
What To Do:
•Have children color their trees first with brown markers or crayons.
•Cut tissue paper into 2x2 squares (prepare ahead of time)
•spread the different colored squares out on table so each child can have access to all colors.
•Have children put small dots of glue on the branches and crumple up tissue paper to put on dots (these are the "leaves") You can help children with this if they have little or no experience with glue. Tip: using the end of pencil to press down the tissue paper to the glue helps avoid sticky fingers.

Leaf Marble Art
You will need:
•yellow,green,red and orange paint
•marbles
• plastic cups/spoons
• leaf template (located in template tab)
•white construction paper
•flat bin with raised sides (get it cheap at the Dollar Tree)
What to do:
~cut out enough leaves for each child to do at least one (they will want to do more)
~use the plastic cups for the paint (one color in each)
~put 1 marble in each cup along with a spoon
~place the leaf on the bottom of the bin and using the spoon "find" marble in the paint and scoop it out. Place on the leaf. (do this for all the colors)
~roll the marbles all around the leaf (encourage the children to do this slowly, we have had many marbles "fly" across the room.)
~remove leaf and allow to dry

Torn Paper Apples
What you need:
• green, yellow and red construction paper
• glue sticks
• apple stencil (you can use one in my templates tab)
• brown construction paper
What to do:
~ tear yellow, green or red construction paper (child chooses color) into small pieces
~ using the apple stencil, trace the apple into a piece of white paper (you can have this prepared ahead of time), and have the children fill in the apple using the torn pieces of paper by gluing them to the center of the apple.
~ use a piece of brown paper (torn) for the stem.

Apple Marble Art• Trace apple onto white construction paper and cut
out (click on apple for template)
•Place in bottom of shallow bin and squirt red paint onto the apple.
•Place marbles in bin and roll around.

What you need:
• red and green paint
• White paper
What to do:
• paint palm of child's hand red (you can also use yellow or green for different colored apples)
• Press palm onto paper and lift.
• Paint tip of a finger green and press down
for stem and leaves.
***make an apple quilt by connecting all the papers together.


COOKING ACTIVITES

Apple Banana Frosty
1 Yellow Delicious Apple, diced
1 Peeled, sliced banana
1/4 cup milk
3 ice cubes
Blender
~Mix all the ingredients together in the blender and serve...YUMMY!
Charoses
6 medium apples
1/2 cup of raisens
1/2 teaspoon cinnamon
1/2 cup chopped nuts
1/4 cup of white grape juice
~chop the peeled or unpeeled apples. Add the remaining ingredients. Mix well.

Toasted Pumpkin Seeds
•Heres a great activity that has multiple lessons involved! We cut open the top of the pumpkins and the children each have an oppotunity to reach in a grab the "guts" we talk about how it feels, smells, etc. They each get a scoop on a paper plate and a bowl to put the seeds in. They fill the bowls with seeds and then wash them through a strainer.
•Have the children spread out their seeds on a cooking sheet (spray cooking sheet ahead of time with cooking spray)
• Spinkle salt on them, put in oven for about 30-40 minutes at 350 degrees..turning as needed until they are golden brown. Remove and cool.

•3 cored, peeled,sliced apples
•2 cups water
•cinnamon
•Blender
~Boil apples until soft, blend in a blender, add cinnamon to taste, refrigerate until cool. Enjoy!

Ants On A Log
•Raisens
•Celery
•Peanut Butter (honey butter can be substituted if you cannot have peanut butter in your center)
~Give each child a piece of celery, raisens, and a spoon of peanut butter (child keeps their spoon of peanut butter to spread) on a paper plate.
~children spread the peanut butter on the celery and then top with raisens.

Caramel Apples
What You Need:
•caramel squares
•Apples (one for each child)
•chocolate morsels
•Sprinkles
•skewers (find at walmart/craft stores)
•wax paper
What To Do:
~Melt the caramel in a saucepan (you can add milk to help thin it out) or use a croc pot.
~ Assist the children in dipping their apple in the caramel.
~Sprinkle with chocolate morsels or sprinkles before they dry!
~place on wax paper

Butter
Making butter is so much fun! This activity can tie in with "The Farm" theme or Thanksgiving.
•1 Baby food jar for each child
•Heavy cream
~Fill each childs jar 1/2 way and replace lid tightly
~Have the children shake until the cream becomes thick.
~refrigerate overnight and serve with rolls.

• 1 Cup Sugar
• 1/2 cup Shortening
• 2 Cups Flour
• 2 Eggs
• 1/2 tsp salt
• 1/2 tsp cloves
• 1 Cup applesauce
• 1 tsp cinnamon
• chocolate chips/Raisens
• 1 tsp baking soda
What To Do:
• Mix 2 eggs, sugar, shortening,apple sauce and baking soda together
• Add remainder of ingredients • Spoon onto a baking sheet
• Cook at 400 degrees until golden brown

A great way to decorate your windows and bring a little Fall in your classroom! These were made with transparency paper, watered down glue, tissue paper and a leaf frame. First "paint" the glue onto the transparency paper then add 1x1 inch squares of yellow,red,orange and green tissue paper. Paint on another layer of glue and add another piece of transparency on top to glue together. Insert between the leaf frame and glue together, Hint: the frame was made from a die cut (the outside).


What You Need:• Caramel
Rice Cakes
• Orange Icing (mix white icing with orange food coloring)
• Green Taffy for leafWhat To Do:• Cover top of
rice cake with orange icing
• Pull apart
taffy and form
Rice Cakes
• Orange Icing (mix white icing with orange food coloring)
• Green Taffy for leafWhat To Do:• Cover top of
rice cake with orange icing
• Pull apart
taffy and form


great way to decorate your windows and bring a little Fall in your classroom! These were made with transparency paper, watered down glue, tissue paper and a leaf frame. First "paint" the glue onto the transparency paper then add 1x1 inch squares of yellow, red, orange and green tissue paper. Paint on another layer of glue and add another piece of transparency on top to glue together. Insert between the leaf frame and glue together, Hint: the frame was made from a die cut (the outside).


Cut out squirrels from paper and color. Attach to the side of cups like above. Place the amount of acorns in the cup that is on the squirrels belly.

Cut an apple in half and dip into red, yellow, or green paint and stamp onto small paper plates. Connect using a hole puncher and yarn. Add multi-colored feet, googly eyes, pom pom for nose and a pipe cleaner for the antennas.

Create this "Look And See" pumpkin by fastening two pumpkins made from construction paper together. Glue white yarn and pumpkin
seeds in the
inside. (See Below)
seeds in the
inside. (See Below)

What You Need:• Caramel Rice Cakes
• Yellow Chocolate Candies or candy corn for eyes
• Brown mini
chocolate candies or
raisins for
mouth
• Banana shaped candies or candy corn for nose
• Orange Icing (you can mix white icing with orange food coloring)
• Green Taffy for leafWhat To Do:• Spread icing over top of rice cake• Add Eyes, mouth and nose with candies
• pull apart taffy and form leaf for top

Stuff a lunch sized paper bag with news paper, tie at the top with a green pipe cleaner and paint orange for this simple to make pumpkin. Add eyes, nose and mouth from yellow construction paper for a Jack-O-lantern!

Using Industrial sized coffee filters, cut out leaf shapes. Mix tempera paint and water (thin enough to suck up in eye dropper) and drop paint onto the leaves.


What You Need:• Sturdy white paper plates
• Hole puncher
• White yarn
• Bobby pins
• Spider ringsWhat To Do:• Punch holes around the plate like above
• Attach one end of yarn through first hole and tie off
• Attach bobby pin to other end and weave the yarn through the hole going across the plate back and forth, tie off end when all yarn is gone
• Cut ring apart in the middle and attach to the web

Close hand into a fist and paint the knuckle side of the hand orange. Press down onto white paper to make a Pumpkin Patch. Use
fingerprints dipped in brown for the stem and green for the leaves. Add grass and sky with crayons or markers.
fingerprints dipped in brown for the stem and green for the leaves. Add grass and sky with crayons or markers.

Cut out the center of a paper plate and paint it black. Add eyes and fold strips of construction paper accordian style and glue
to plate.
to plate.


What You Need:• Vienna Fingers
• White Icing
• Mini chocolate candies
• Plastic knivesWhat To Do:• Cover the top and side of the cookies with icing using plastic knives
• Add chocolate candies for eyes and mouth
• White Icing
• Mini chocolate candies
• Plastic knivesWhat To Do:• Cover the top and side of the cookies with icing using plastic knives
• Add chocolate candies for eyes and mouth